Catalog installation information
Track-based stair nose installation.
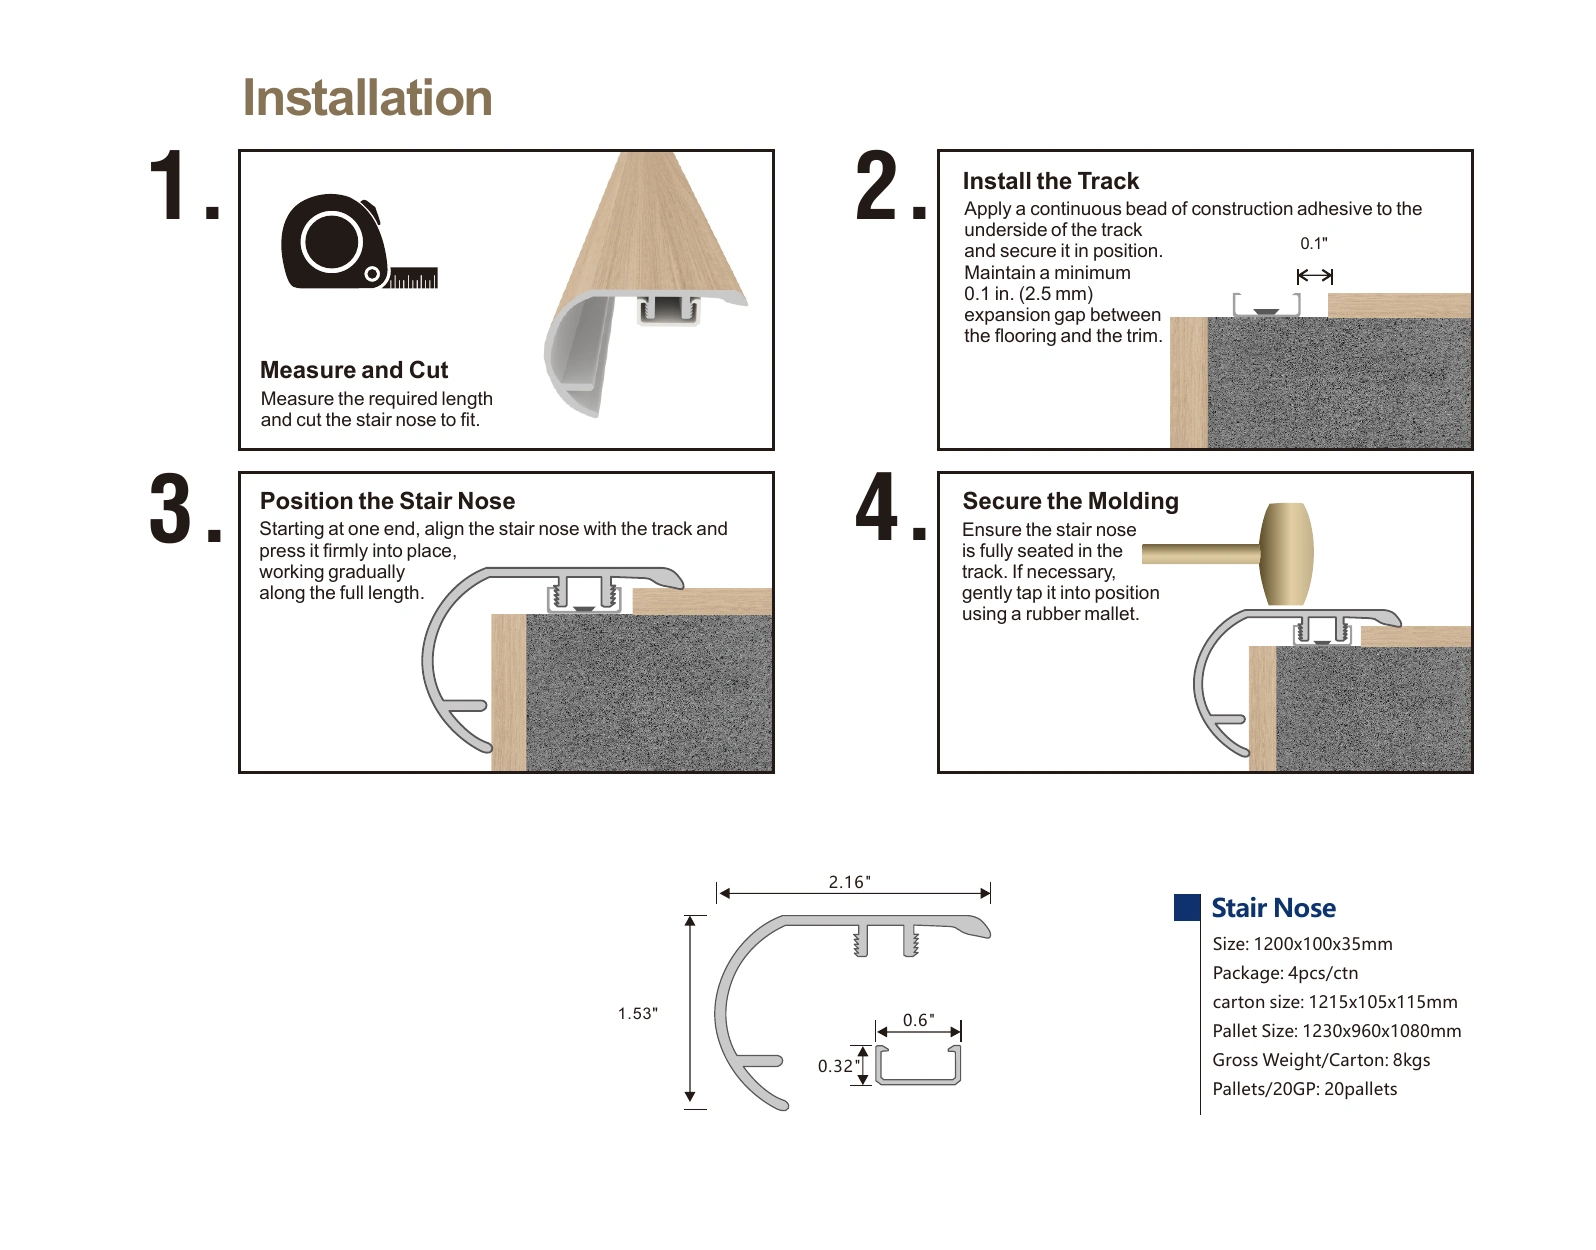
The following sequence applies to the stair nose and track system illustrated on PDF page 20 of HX Catalog 2026. Confirm product compatibility and the approved installation instructions for your program.
Four documented steps
- Measure and cut. Measure the required length and cut the stair nose to fit.
- Install the track. Apply a continuous bead of construction adhesive to the underside of the track and secure it in position. The catalog specifies a minimum 0.1 in. (2.5 mm) expansion gap between the flooring and trim.
- Position the stair nose. Align the stair nose with the track at one end, then press it firmly into place along the full length.
- Seat the molding. Ensure the stair nose is fully seated. If necessary, gently tap into position with a rubber mallet.
This is a product-specific catalog summary. Adhesive selection, substrate preparation, and compatibility requirements must be confirmed for the actual flooring and stair assembly.